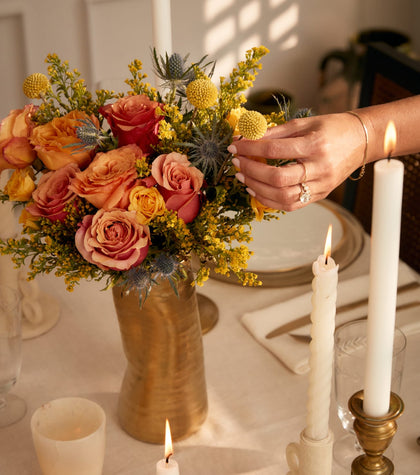
- Prep Your StemsTrim your stems at a 45° angle using sharp, clean shears. (Pro tip: remove any extra foliage that will fall below the water line!)
- Keep Them HydratedFor best results, change your flower's water daily. It should look good enough to drink!
- Find Some ShadeFor happy and healthy blooms, place your flowers in a cool room away from direct sunlight.
Tips & Tricks From The Experts
How Your Package Will Arrive At Your Door
Flower FAQs
Looking for more info about your flowers? Find your answers below.
How do I care for a particular flower type?
Peonies
The first thing to know is that your peonies will arrive in bud form (meaning they may look like tight balls at first) and they are shipped dry, so you may notice some of the leaves look droopy. Don’t worry! We ship our peonies this way so that they’ll last longer for you once they arrive.
Once you’ve unpacked your peonies, here’s what to do:
- Remove most of the foliage from the stems. This encourages more water to flow up the stem to the flower head.
- Prepare your vase water – mix cool water and flower food according to the instructions on the food packet, and fill your vase.
- Trim the stems of the peonies several inches with a sharp knife or floral shears and place in water immediately
- Wait about 24 hours and your peonies should begin to open & bloom into the frilled blossoms you love.
- To maximize the vase life of your peonies, keep them away from direct sunlight and sources of heat. If you have the space to do it, popping them into your fridge (away from the walls, toward the center of the shelf) can help as well.
- Check the water level in the vase each day. Add water if the water level is low and refresh the water every other day or if the water becomes cloudy.
Roses
When it comes to roses, remember that you can remove any exterior guard petals, which will freshen up your roses really nicely and help them to develop.
If a rose seems very tight or like it’s not developing you can help it along by blowing gently on the petals or very gently separating them with your fingers.
If your roses start to neck or a bloom starts to hang over, give the stem a fresh cut and let the rose rehydrate in a separate vase away from the other flowers. It’s not a bad idea to change the water for the rest of your flowers at the same time.
Sunflowers
Tips for getting the most out of your cheerful, sunny sunflowers:
- When you receive your sunflowers, they may arrive slightly less developed; you may notice the petals haven’t all totally unfurled. We ship them this way so that they’ll last longer for you when they arrive, and so that their petals are protected during shipping.
- Remove any packing materials around the flowers, and remove any lower foliage on the stems.
- Prepare your vase with a mixture of cool water and flower food (mixed according to the instructions on the flower food packet)
- Trim your sunflower stems several inches and place them in the water immediately
- Place your flowers away from sources of heat or direct sunlight to maximize vase life
- Check the level of water in your vase every day – sunflowers are thirsty and can drink their vase water quickly. Add more water if the water level begins to run low, and change the water immediately if it becomes cloudy. If you are changing the water due to it being cloudy, trim the stems at the same time.
Lillies
The first thing to know about your lilies is that we ship them in bud form (meaning some of the flowers will be tightly closed). We do this because the flowers will hold up in shipping and last longer for you if they arrive slightly less developed. Lilies are some of the most recognizable and most fragrant flowers that mother nature produces, so let’s cover how to care for them.
- When your lilies arrive, remove most of the foliage from the stems. You can leave a small number of leaves near the blossoms, but the idea here is to strip the stem so that more water is drawn up to the flowers.
- Prepare your vase with a solution of fresh water and flower food (mix according to the instructions on the package)
- Trim your lily stems with a sharp knife or with floral shear and arrange your flowers into the vase
- Place your flowers away from direct sources of heat and sunlight, which will help extend their vase life.
- Your lilies should begin to develop and open in about 24 hours.
If your lilies seem to be stuck or they aren’t opening, try removing all foliage from the stems, trimming the stems again, and letting the lilies hydrate in room temperature or lukewarm water (never hot water), which can help to jumpstart them a bit.
Pro-tip: As your lilies open, you may want to remove the anther (that’s the tip of the stamen in the middle of the flower that spreads pollen) because lily pollen can stain textiles. To do this, you can trim them away with a pair of shears or just pinch them off. If any pollen gets on your clothing, you can remove it with a strip of adhesive tape, like packing tape. If any pollen gets on the flowers, you can remove it with the end of a pipe-cleaner. Just use the pipe cleaner to dust the petals off.
Ranunculus
Ranunculus are beautiful flowers with plush blossoms that come in a wide array of colors. They do benefit from a little additional care when you keep them as cut blooms.
- When you receive your ranunculus, unpack them and prepare your vase with a solution of cool water and flower food (mix the food according to the instructions on the packet).
- Trim the stems several inches with a sharp knife or with floral shears
- Place your ranunculus in water to hydrate
- Keep your flowers away from sources of heat and out of direct sunlight to maximize vase life.
- Pro-tip: Dirty vase water is the enemy of ranunculus and will dramatically shorten their vase life. Ranunculus benefit from having their water changed at least every other day (you can do this daily if you want to be the best flower mom out there). If the water ever appears cloudy, change it and re-trim the stems immediately.
- Pro-tip 2: Ranunculus have a softer stem than some other flowers, and that stem can be easier to damage. This is why it’s so important to trim the stems with a sharp knife or floral shears, rather than kitchen scissors. Also, when arranging your flowers, if you choose to bind them with an elastic band or twine, be sure you aren’t crushing your ranunculus stems! (This also goes for other soft stemmed flowers like anemone, snapdragons, tulips, and calla lilies).
Delphinium
Delphinium is a beautiful and unique flower that grows multiple fleurets along its stalk. Some varieties unfurl into a dramatic display of blooms that are more than 12 inches long! Here’s what to know about delphinium.
- When you unpack your delphinium, begin by preparing your vase with a solution of cool water and flower food (mix the food according to the instructions on the packet)
- Trim your delphinium stems with a sharp knife or floral shears and place your flowers into water to hydrate.
- Give your flowers about 24 hours to fully hydrate. You may notice, at first, that some of the fleurets look shriveled, or that the top of the delphinium stem seems to be curled up into itself. The blooms will perk up and begin to open more fully with time and water.
- Place your flowers away from heat or direct sunlight to maximize vase life.
A heads up about their color: Delphinium are most often seen in shades of blue, purple and white. Their color can shift a bit depending on the levels of sunshine and rain at our flower farms, so you may find that your delphinium vary slightly in their color.
Mums
Mums come in a wide array of colors and textures all throughout the year. Here’s how to keep your cut mums happy:
- When you receive your mums, unpack them and remove most of the foliage from the stems, taking special care to strip any foliage that will fall below the waterline in the vase.
- Prepare your vase by filling it with a solution of cool water and flower food (mixed according to the instructions on the back of the food packet)
- Trim your stems several inches with a sharp knife or flower shears, and place your mums in water immediately.
- Place your flowers away from direct sunlight or sources of heat to maximize vase life.
- Check the water level in the vase each day. Add water if the water level is low and refresh the water every other day or if the water becomes cloudy.
Pro-tip: To help prevent varieties of mums with longer petals (like spider mums) from shedding their petals, you can spray a little bit of hairspray to the bottom of the bloom. This helps the flowers to hold on a little bit.
Tulips
Tulips are so exciting to keep as cut flowers because they’re really dynamic. Two important things to know about tulips is that they continue to grow after they’re cut and put in the vase – they can get several inches longer in the time that you have them. Also, they’re phototropic, which means that they’ll actually move in response to the sunlight. So, with that in mind, here’s how to keep your tulips happy:
- When you receive them, remove any lower foliage on the stems and give your tulips a fresh cut with a clean knife or flower shears.
- Place flowers into fresh cool water. You won’t find any flower food included with your tulips because it causes them to develop too quickly.
- Place your flowers away from any sources of heat or direct sunlight (which will help them last longer for you.
- Change the water every couple of days or if it becomes cloudy. If you notice that the water is cloudy, retrim them stems when you change the water.
If you find that after a couple of days your tulips are leaning over, this doesn’t mean that they’re in bad shape! Many of our specialty tulips (like double or peony tulips, or parrot tulips) have a higher petal and can become a little top-heavy as they hydrate. Plus as all our tulips grow in the vase, they sometimes begin to lean their heads over. The good news is that there’s an easy solution!
- Take your tulips out of the vase
- Remove all foliage from the stems
- Trim the tulips again (don’t be nervous here; you can cut an additional 2-3 inches or more from the stems and your tulips will be just fine)
- Rearrange your newly trimmed tulips in fresh water, and the heads should begin to perk up after about 24 hours.
Irises
Tips for caring for & enjoying Irises:
- Unpack your irises and prepare your vase with a solution of cool water and flower food, mixed according to the instructions on the food packet.
- Cut the iris stems on a 45 degree angle with a sharp knife or floral shears and place them into the vase immediately
- Place your flowers away from any sources of heat or direct sunlight
- Allow your flowers to hydrate and open for about 24 hours
- Keep an eye on the water in the vase; if it becomes low, top it up, and if it becomes cloudy, change it and recut your stems immediately. Pro-tip: changing the vase water more frequently, every other day or so, will extend the life of your flowers.
Also if you want to open your irises more quickly, you can use the tapping trick. Peel the tips of the green foliage enclosing the flower back very gently. Then, hold the flower by its stem and tap the bud against the side of your extended pointer finger. This will help to stimulate the flower opening without damaging the bloom.
Hydrangeas
- Hydrangeas are very thirsty so it’s super important that they be cut and hydrated with flower food upon delivery. A nice clean cut with a sharp knife or floral shears is much better for them. Avoid using kitchen scissors!
- Also, remove some of the leaves on the stem to encourage more water to flow up the stems to the blooms.
- Hydrangea can actually drink water through their petals! If your hydrangeas are really struggling to hydrate, you can fully submerge them in cool or room temperature water for about 15 - 20 minutes. If you do give your hydrangea a little bath, be sure to path them dry to keep the petals healthy!
Why did my flowers come without water?
We ship your gift dry so that bacteria does not grow around the base of the stems. Remove your flowers from the box right away, trim the stems at an angle, and place in water as soon as possible. In a few hours, your flowers will begin to soak up the water and if any stems looked a little droopy upon arrival, they should start to perk up!
Why does the bouquet look smaller than it did on the site?
When we pack them, they are purposefully packed smaller so the flowers don't get harmed on the way! When you get it, you need to fluff the bouquet, place it in water immediately, and the flowers will begin to expand over time.
My flowers look like they're wilting when they arrived. Why?
Your flowers will arrive thirsty since they've been out of water during their travels to you! Think of it as a marathon - they just went on a really long run, and they’re dehydrated. Once you place them in water, the flowers will begin to perk back up after 6-24 hours.
